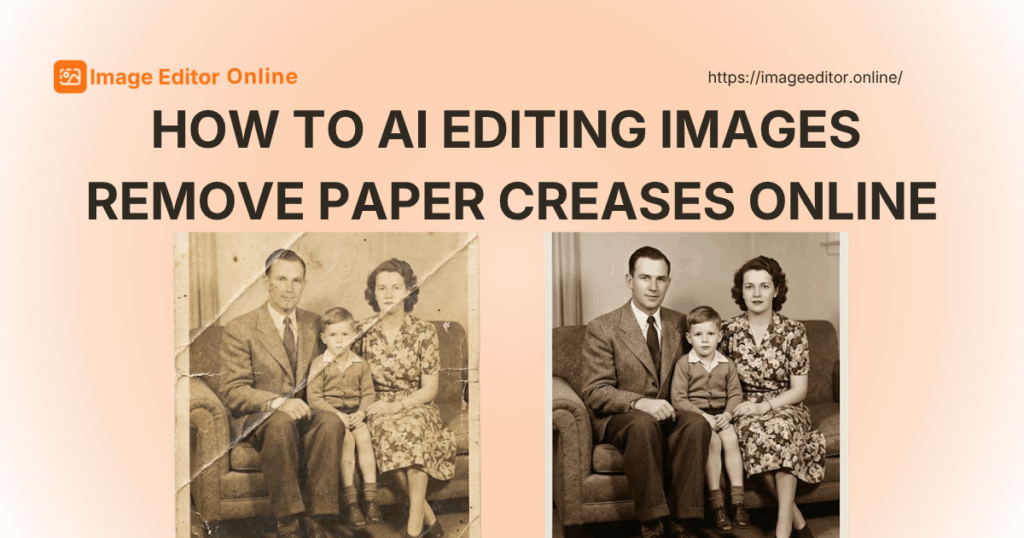
If you have ever scanned an old letter, a folded contract, or a crumpled photograph, you already know the frustration. The content is there. The handwriting, the faces, the important details — but the paper creases cut right through them like uninvited fault lines. Traditional photo editing software could fix this, but the process was slow, required manual work, and demanded skills most people do not have.
That is why so many people now search for ai editing images remove paper creases instead. Modern AI tools can detect fold lines, wrinkles, and creases automatically and smooth them out without a single layer mask or clone stamp. This is not a future concept — ai editing images remove paper creases works right now, and it works fast. The guide below covers what causes the problem, how the technology handles it, and exactly how to get good results the first time.
Why Paper Creases Ruin Otherwise Good Images
Paper creases appear in images for a variety of reasons. Documents get folded for mailing, stuffed into envelopes, stored in drawers, or simply handled too many times over the years. When those documents are scanned or photographed later, the creases show up in a few predictable ways:
Dark shadow lines running diagonally or horizontally across the image
Raised or indented ridges distorting text and detail beneath them
Contrast breaks that cause OCR (optical character recognition) to fail on key words
Visual distractions pulling the eye away from the actual content
For personal photos, it is an aesthetics issue. For legal documents, academic records, medical forms, and historical archives, visible creases can compromise readability and credibility. When you need to remove paper creases from a document that matters, doing it manually takes time — but ai editing images remove paper creases takes seconds.
How AI Editing Removes Paper Creases: The Technology Behind It
Understanding how the process works helps you set realistic expectations. When you use a tool to ai edit images remove paper creases, it moves through three distinct stages.
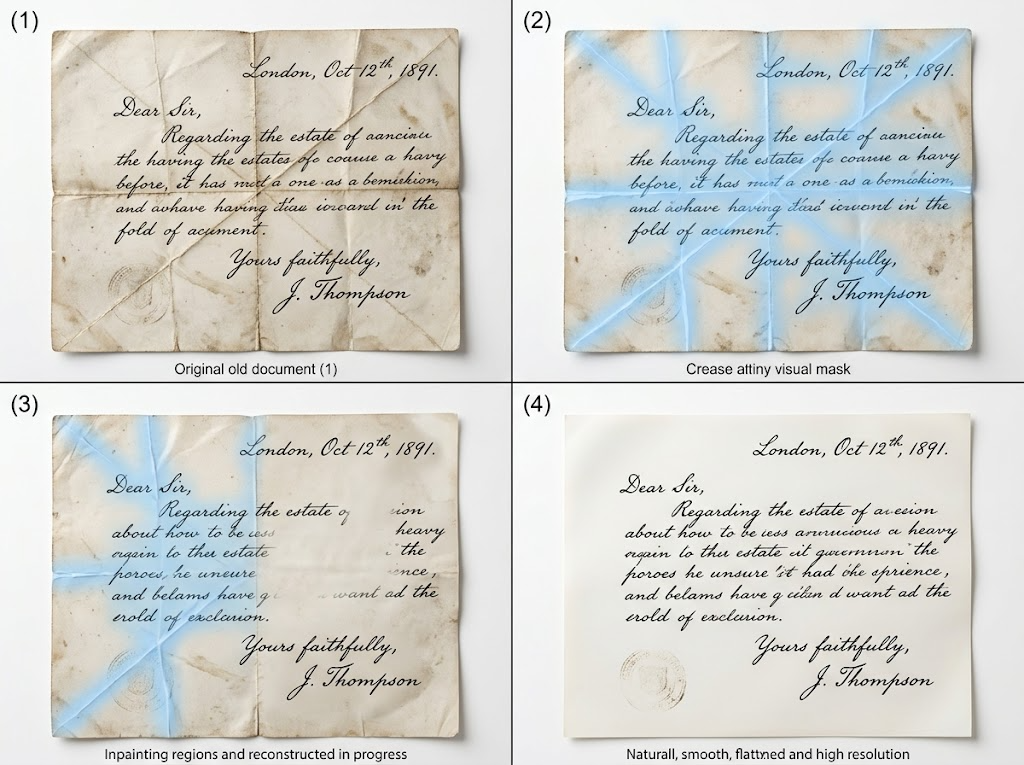
Stage 1 — Crease Detection
The AI scans your image and identifies linear or curved patterns that do not match the surrounding background. Fold lines, crease shadows, and wrinkle ridges are all flagged as areas that need correction. The model has seen millions of crease examples during training, so it recognizes these patterns even when they are faint or partially obscured by other damage.
Stage 2 — Contextual Inpainting
Once flagged, the AI fills in the crease areas by analyzing what the image should look like in those spots. It asks a simple question: if the fold had never happened, what would this part of the image show? Deep learning trained on enormous image datasets lets the tool reconstruct continuous paper texture, a face, handwriting, or any other detail with reasonable accuracy. This is the core of what ai editing images remove paper creases actually does — it does not hide the crease, it rebuilds what was underneath it.
Stage 3 — Post-Processing and Blending
After inpainting, the restored area is blended with the original image so there is no flat patch or color mismatch. The repaired section should look indistinguishable from the rest of the photo. This step separates a good result from an obviously edited one, and it is why the best ai editing images remove paper creases tools produce results that look natural rather than patched.
This three-stage pipeline is why modern AI outperforms older methods at this task. The crease does not simply become less visible — it disappears.
Common Scenarios Where AI Crease Removal Makes a Difference
Before choosing a tool, it helps to identify your specific situation. The way a crease appears in a scanned contract looks different from a crease in a vintage portrait, and the right approach varies.
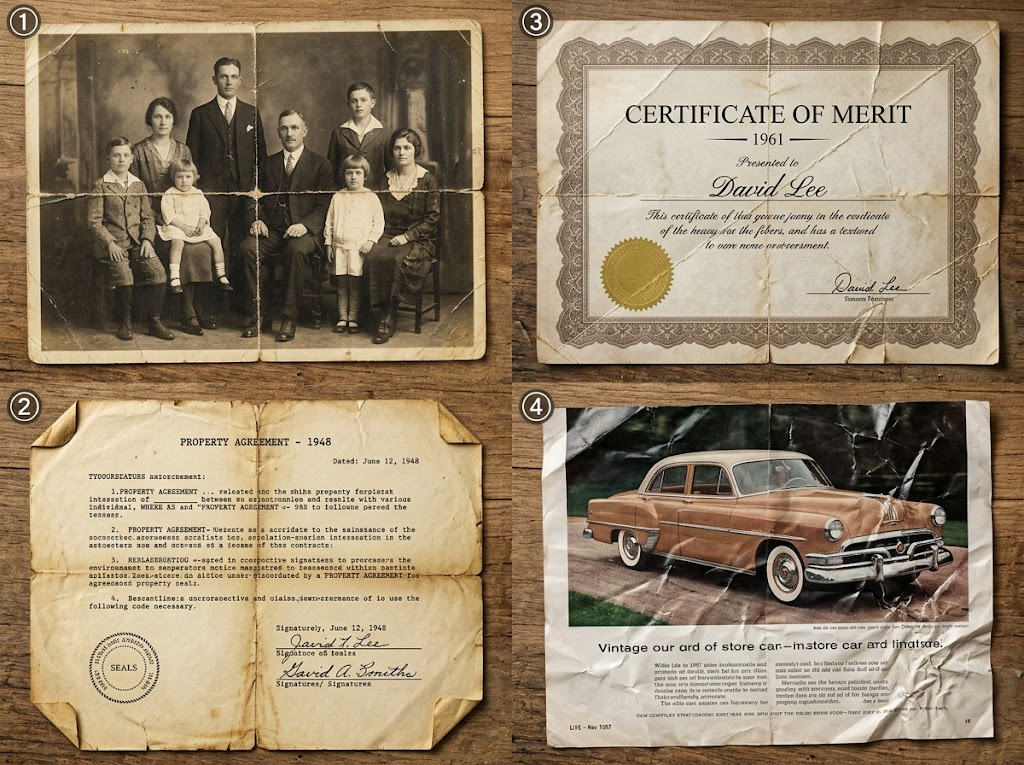
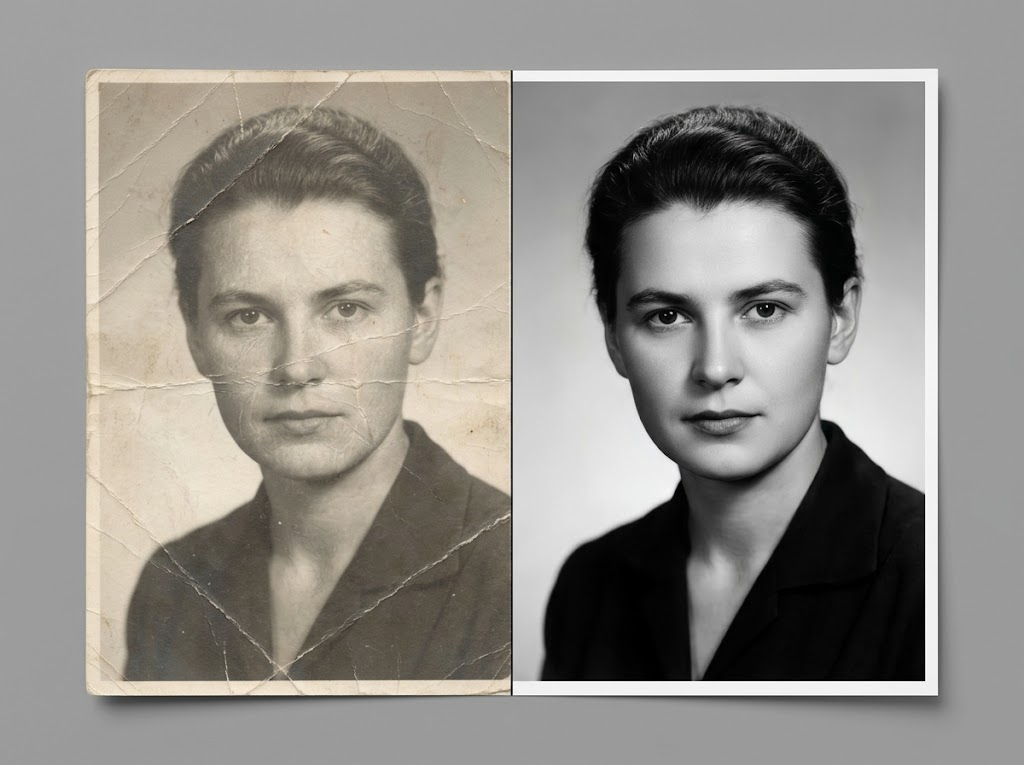
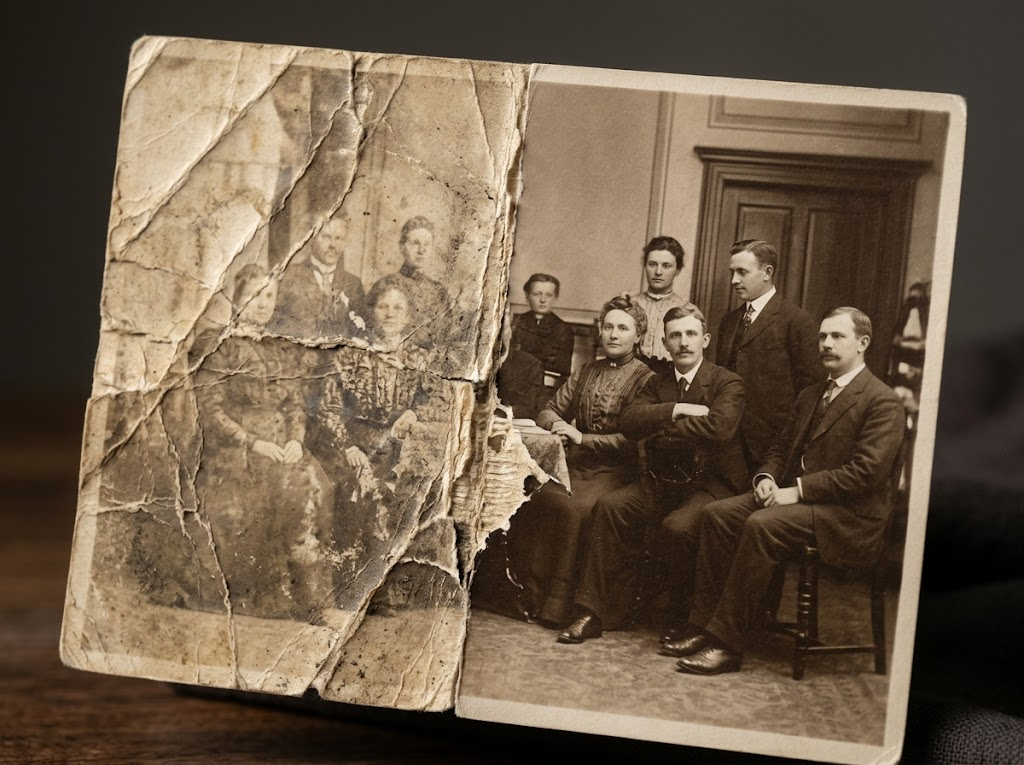
Scenario 1: Old Family Photographs
Photographs stored in albums or drawers often develop horizontal or diagonal fold lines over decades. Faces, backgrounds, and fine details are all affected. AI restoration tools work particularly well here because they have been trained on large datasets of portrait and landscape photos. When a fold runs through a person's face in a cherished old photo, ai editing images remove paper creases will detect the crease shadow and fill in the missing detail without distorting surrounding skin tones. This is where the technology stands apart from a basic sharpen filter.
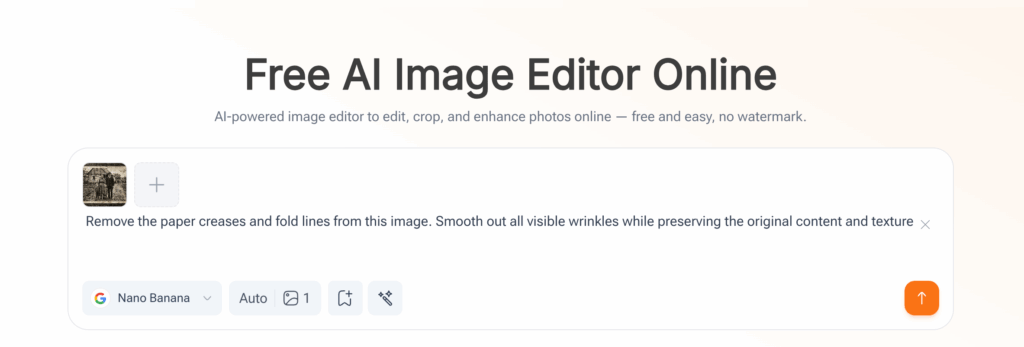
Scenario 2: Scanned Legal or Business Documents
A contract folded in thirds for mailing typically develops two parallel horizontal creases. These can obscure signatures, dates, and other critical information. If you need to submit a clean digital copy of a folded legal document, ai editing images remove paper creases gives you a readable result without spending twenty minutes in Photoshop cloning areas manually. For legal teams handling large volumes of physical correspondence, this matters.
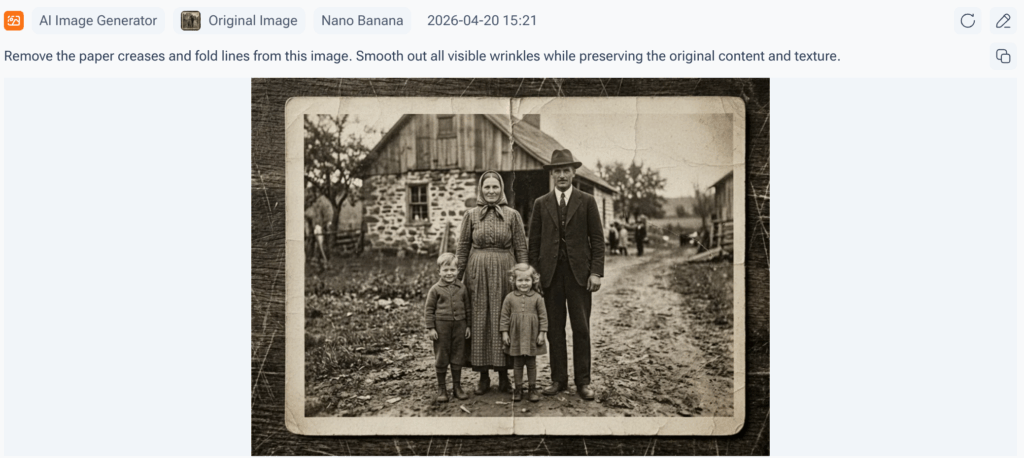
Scenario 3: Academic Transcripts and Certificates
Official documents submitted for immigration, job applications, or university enrollment sometimes arrive with visible fold damage. A damaged transcript or certificate can raise questions during review. Cleaning up the image before submission is professional due diligence, not vanity. Using ai editing images remove paper creases on your certificate scan before uploading it to an application portal removes that distraction and presents your document cleanly.
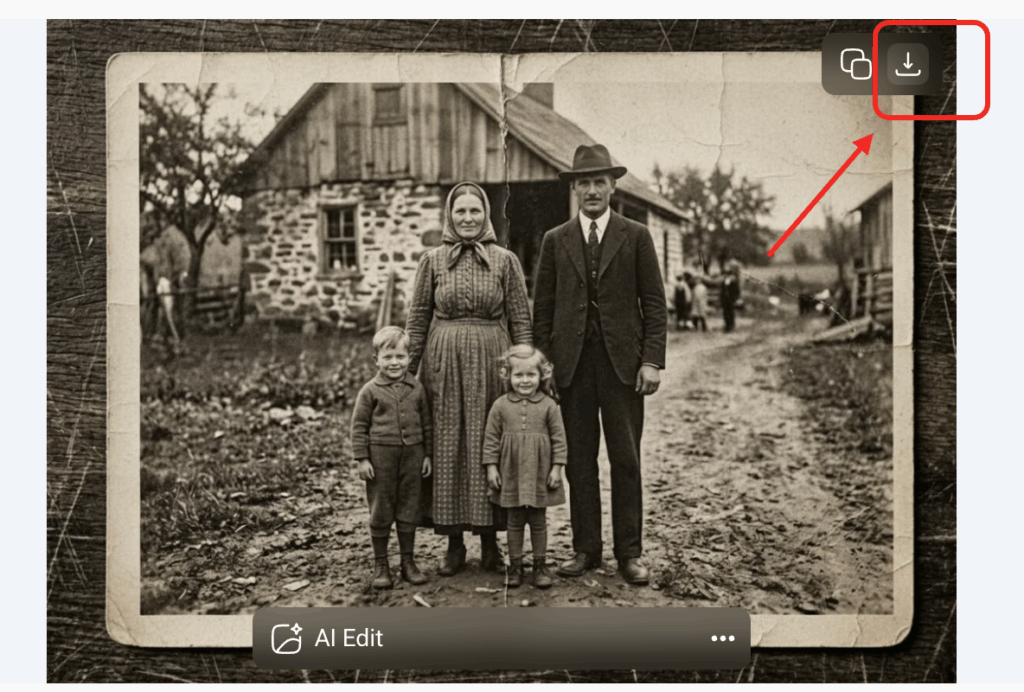
Scenario 4: Product Listings and Commercial Photography
Packaging shots, fabric swatches, and printed materials photographed in a studio sometimes develop unwanted crease shadows. When you are selling online, those shadows catch the light and stand out in ways you do not want. Running a quick pass with ai editing images remove paper creases on your product photos before listing them removes that distraction and gives your catalog a consistent, professional appearance.
How to AI Edit Images to Remove Paper Creases Using Image Editor Online
Image Editor Online is a browser-based tool that handles paper crease removal without requiring you to install any software or create an account. Its AI model reads the structure of your image and applies targeted restoration where fold damage is present. The workflow is straightforward and takes minutes.
Here is how it works:
Step 1 — Upload Your Image

Go to Image Editor Online and upload the photo or scanned document you want to fix. The platform accepts JPG and PNG formats. You can upload from your device or drag and drop the file directly into the browser window.
There is no registration wall. Upload your image and start working immediately. This is particularly useful when you are processing multiple documents or working against a deadline.
Step 2 — Describe the Edit Using a Text Prompt
The platform uses AI-driven prompt-based editing. In the prompt field, enter a clear instruction. For crease removal, something like:
"Remove the paper creases and fold lines from this image. Smooth out all visible wrinkles while preserving the original content and texture."
The AI interprets your instruction and applies the appropriate inpainting and blending. You do not hunt through menus or adjust sliders. You describe the problem, and ai editing images remove paper creases happens automatically.
Step 3 — Preview and Refine
Once the AI processes your image, preview the result side by side with the original. If certain crease areas were not fully resolved, refine your prompt or use the multi-round editing feature to target specific regions with a follow-up instruction. This iterative approach means you are not stuck with the first result. If you are using ai editing images remove paper creases on a complex old photo, you may need two or three passes to get the result you want. That is fine — the tool supports it.
Step 4 — Download the Final Image
When the result looks right, download the cleaned image directly. No watermark, no subscription gate for basic use. The image is ready for documents, print, or digital formats. Whether you are using ai editing images remove paper creases on a stack of old family photos or a single business document, the workflow stays the same.
Comparing AI Tools for Paper Crease Removal
Not every tool approaches this the same way. Here is a direct comparison focused on ai editing images remove paper creases:
| Tool | Approach | Ease of Use | Best For |
| Image Editor Online | Prompt-based AI editing, multiple models | Very easy | General use, photos, documents |
| photor.io | Dedicated crease removal function | Easy | Quick single-image fixes |
| VanceAI | Photo restoration suite | Moderate | Batch processing, upscaling |
| Simplified Magic Remover | Object/area removal tool | Easy | Crumpled paper, isolated areas |
| photorestore.ai | Automated photo restoration | Very easy | Old photos, scratches, folds |
If you need a free, no-registration tool that lets you describe what you want in plain language, Image Editor Online is a practical starting point. If you need to process hundreds of images or require fine manual controls, a dedicated photo restoration suite like VanceAI offers more depth.
Tips for Getting the Best Results When You AI Edit Images to Remove Paper Creases
AI tools perform better when the input image is well-prepared. These five practices consistently make a difference.
1. Scan at the highest resolution available
More pixel data gives the AI more to work with. Scan documents at 300 DPI minimum. For old photographs, use 600 DPI or higher. This is one of those areas where you genuinely cannot recover what was never captured digitally. Better resolution in means better results when ai editing images remove paper creases at the end.
2. Use even lighting when photographing documents
If you photograph rather than scan, avoid harsh directional light that casts shadows along the creases. Those shadows add a second layer of distortion the AI has to process through. A diffused, frontal light source produces cleaner images and makes ai editing images remove paper creases faster and more accurate.
3. Be specific in your prompt
Specific prompts consistently outperform vague ones. Compare "remove the crease running diagonally across the top-left corner of this scanned photo" against a generic "fix the image." When you use ai editing images remove paper creases, the AI responds to detail. The more you give it, the better it performs.
4. Do not over-process after the AI fix
Once the crease is removed, resist adding extra sharpening or contrast adjustments. These can introduce new artifacts. AI editing images remove paper creases relies on seamless blending, and additional editing after that step can disrupt the balance the tool worked to achieve.
5. Confirm the entire crease is in frame
Fold lines near the edge of a document sometimes fall partially outside the scan frame. If a crease runs off the edge of the image, the AI cannot detect or fix it. Make sure the entire crease is visible before running the correction.
Why AI Editing Makes Paper Crease Removal Accessible to Everyone
A few years ago, removing paper creases from an image meant either learning Photoshop's healing brush and clone stamp tools or paying someone who already knew them. You had to select the area manually, clone over the crease line, and hope the surrounding texture matched well enough. Neither option was fast.
AI editing has changed that. Tools that let you ai edit images remove paper creases bring professional-grade results to anyone with a browser. No design background, no software installation, no learning curve. Describe what you want. Let the AI do the technical work. Get a clean image in under a minute.
The demand for crease removal spans a wide range of people. Families restoring old photographs. Legal teams processing physical correspondence. Educators digitizing records. Businesses maintaining visual quality across product catalogs. None of these groups need a graphic design degree to fix a crease — and with ai editing images remove paper creases, they do not have to wait for one either.
FAQs
Can AI completely remove deep paper creases from old photographs?
In most cases, yes. Modern AI inpainting can reconstruct content beneath moderate crease damage, provided underlying information is at least partially visible. Severely torn or fully obscured areas may need manual touch-up after the AI pass.
Does AI editing images remove paper creases damage image quality?
A well-built tool does not reduce overall image quality. The inpainting process fills crease areas using surrounding pixel data, then blends the result to match the original texture and color. The output looks clean, not artificially smoothed.
How long does ai editing images remove paper creases take?
Most online tools process a standard-resolution image in under 60 seconds. Larger or high-resolution files take longer, but the wait is rarely more than a few minutes.
Is Image Editor Online free for paper crease removal?
Yes. Core AI editing features including crease and damage removal are available without an account. Basic use has no paywall.
Can AI remove creases from scanned text documents without damaging the text?
Yes. AI crease removal tools are trained to distinguish between content — text, drawings, faces — and damage such as crease lines and shadows. The text remains intact and readable after processing.
Conclusion
Paper creases are a fact of physical documents. They do not have to be a fact of your digital files. When you use ai editing images remove paper creases, the process combines detection, intelligent inpainting, and natural blending to deliver results that would have taken an experienced editor an hour to achieve manually.
Whether you are restoring worn family photographs, cleaning up scanned legal documents, or preparing product images for an online listing, the workflow is simple: upload, prompt, preview, download. Tools like Image Editor Online have made ai editing images remove paper creases fast, free, and genuinely accessible to anyone with a browser. No design skills required. No subscription needed.
The technology works. The barrier to use is lower than it has ever been. If you have a folder full of images waiting to be rescued from fold damage, the time to act is now.